DIY Zodiac Wall Decor: Personalized Art for Your Home
WallfullyTL;DR:
- DIY zodiac wall decor allows personalization by reflecting individual signs’ personality traits and styles. Creating these pieces involves simple materials and step-by-step techniques that accommodate beginners and seasoned crafters alike. Personalizing colors, motifs, and arrangements ensures each artwork complements the room while expressing unique astrological energy.
You’ve browsed the same mass-produced prints in every home goods store and walked away empty-handed because nothing feels like you. That frustration is real, and it’s exactly why DIY zodiac wall decor has exploded in popularity. Your sign is already a reflection of your personality, your energy, and the way you move through the world. Turning that into wall art just makes sense. Whether you’re a Scorpio who gravitates toward deep, moody jewel tones or a Gemini drawn to layered, eclectic displays, this guide walks you through everything from planning and gathering materials to hanging your finished piece with confidence.
Table of Contents
- What to know before you start: Zodiac wall decor basics
- Gathering your tools and materials
- Step-by-step: Creating your personalized zodiac wall art
- Troubleshooting and avoiding common mistakes
- Showcasing your creation and thoughtful gift ideas
- Why creativity matters more than astrological accuracy
- Find more inspiration and ready-to-make zodiac art
- Frequently asked questions
Key Takeaways
| Point | Details |
|---|---|
| Zodiac is inspiration | Your wall decor can reflect personality without following astrology rules. |
| Materials are flexible | Choose supplies and motifs based on what you have and the style you love. |
| DIY steps are simple | Sketch, paint, detail, and hang—making creative wall art is approachable for all levels. |
| Gifting adds meaning | Personalized zodiac art makes a heartfelt, customized present for friends and family. |
| Creativity is key | The most memorable projects let your style and vision shine through. |
What to know before you start: Zodiac wall decor basics
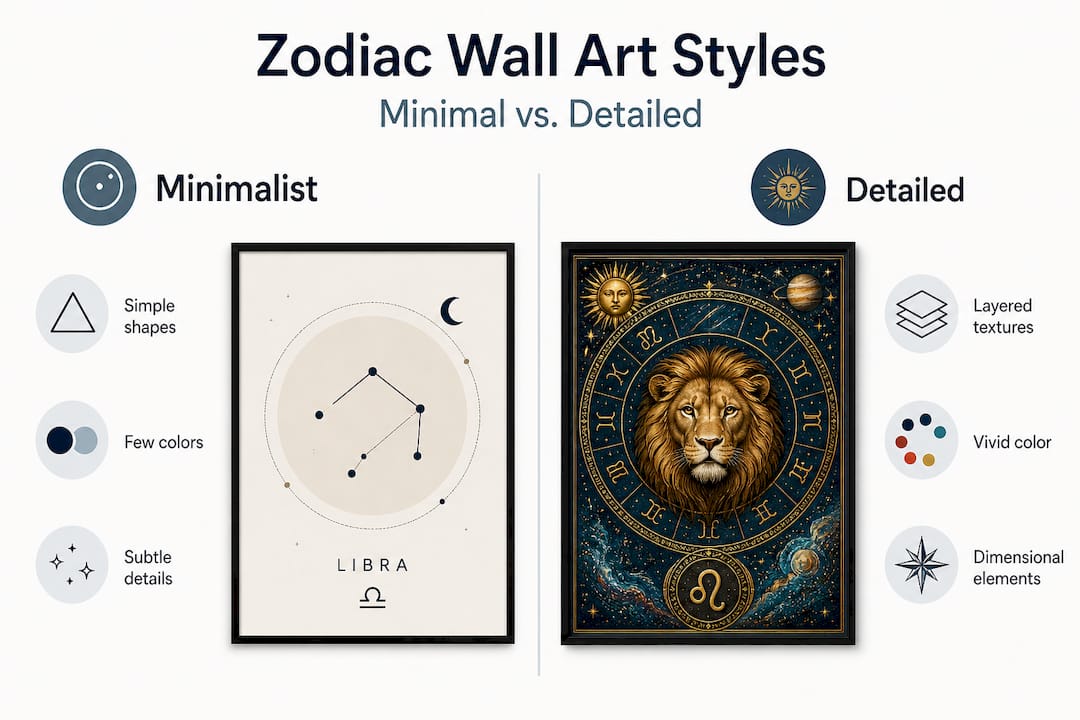
Before you buy a single paintbrush, it helps to understand what zodiac wall decor actually is and what it isn’t. It is not an astrology lesson. You don’t need to memorize birth charts or planetary placements. Instead, think of your zodiac sign as a creative lens, a starting point for choosing motifs, color palettes, and overall style. Zodiac decor styling is framed by home decor experts as a “lens” for personal taste rather than a strict rulebook, and that’s exactly how you should approach it.
Understanding the meaning of zodiac wall art helps you make intentional creative choices rather than just picking random celestial imagery. For example, knowing that earth signs like Virgo and Capricorn tend to favor clean lines and muted, grounded tones gives you a clear direction. Water signs like Pisces and Cancer often respond to fluid shapes, soft gradients, and moon imagery. Fire signs like Aries and Leo might lean into bold, high-contrast pieces with gold accents. Air signs like Aquarius and Libra tend to enjoy geometric patterns and layered compositions.
Room style and lighting matter just as much as sign symbolism. A piece that looks stunning in a sunlit living room can feel flat in a dimly lit hallway. Consider the room’s existing palette, the amount of natural light, and the mood you want to create before you commit to a color scheme.
Common zodiac décor motifs to consider:
- Constellation maps and star charts
- Zodiac glyphs and symbols
- Moon phases and lunar cycles
- Elemental imagery (fire, water, earth, air)
- Color palettes tied to each sign’s ruling planet
- Mythological figures associated with each constellation
Here’s a quick comparison to help you match your approach to your sign’s temperament:
| Décor approach | Signs that tend to favor this | Style characteristics |
|---|---|---|
| Structured, precise | Capricorn, Virgo, Taurus | Clean lines, muted tones, minimal clutter |
| Intuitive, expressive | Pisces, Cancer, Gemini | Fluid shapes, layered textures, mixed media |
| Bold and dramatic | Leo, Aries, Scorpio | High contrast, metallic accents, strong focal points |
| Geometric and conceptual | Aquarius, Libra, Sagittarius | Abstract shapes, asymmetry, color-blocking |
Explore top zodiac wall art ideas to see how other creators have interpreted these themes in real spaces. Now that you know what makes zodiac wall decor so personal, let’s gather what you’ll need.
Gathering your tools and materials
The good news is that you don’t need an art studio or a massive budget to create something beautiful. Most of the supplies are available at any craft store, and several can be repurposed from materials you already have at home. For celestial projects like zodiac art tutorials, the base material you choose shapes the entire look of the final piece.
Core materials you’ll need:
- A base surface: stretched canvas, a wood panel, or thick cardboard (at least 300gsm)
- Acrylic or watercolor paints in your chosen palette
- A variety of brush sizes (flat, round, and fine detail brushes)
- Pencils and an eraser for sketching
- Zodiac stencils or printed reference images
- Metallic markers or gold leaf sheets for accents
- A ruler and compass for constellation maps or geometric designs
- Strong adhesive or a glue gun for mixed-media elements
- Hanging hardware or a sawtooth bracket for the back
| Material | Primary use | Budget substitute |
|---|---|---|
| Stretched canvas | Main painting surface | Thick cardboard or foam board |
| Acrylic paint | Opaque, fast-drying color | Craft store sample pots |
| Watercolor set | Soft, translucent effects | Diluted acrylic with more water |
| Metallic markers | Fine detail and accents | Gold or silver gel pens |
| Wood dowel | Hanging rail for fabric pieces | Old chopstick or thick twig |
| Glue gun | Securing dimensional elements | Strong craft glue or double-sided tape |
A DIY moon phases hanging is a great example of how simple materials come together beautifully. You sketch the phases evenly across a surface, paint each section, then assemble and add a hanging mechanism. The total cost can be under $15 if you already have basic craft supplies.
Pro Tip: Before buying new frames, check thrift stores and garage sales. An old frame with a coat of spray paint becomes a stunning border for zodiac art, and it saves money while reducing waste.
With everything ready, it’s time to put your vision into action with a step-by-step process.
Step-by-step: Creating your personalized zodiac wall art
Now comes the part everyone waits for. The actual making. Following a clear process prevents wasted materials and creative frustration. If you prefer a different motif, say constellations instead of a glyph, simply swap in the relevant sketch in step two. The process stays the same.
- Sketch your layout. Lightly pencil the main design onto your base. Keep proportions loose at this stage. Mistakes are easier to erase now than to paint over later.
- Apply background color. Use a wide flat brush to lay down your base color in smooth, even strokes. Let it dry fully before moving on. Rushing this step causes colors to bleed and muddy.
- Transfer or draw your main motif. Use a stencil, lightbox tracing, or freehand sketching to add your zodiac symbol, constellation, or moon phase design. Use a fine pencil so lines are easy to cover with paint.
- Paint the motif in layers. Start with light base coats, then build up darker tones and highlights. Thin your acrylic paint slightly with water for smoother blending, especially on darker backgrounds.
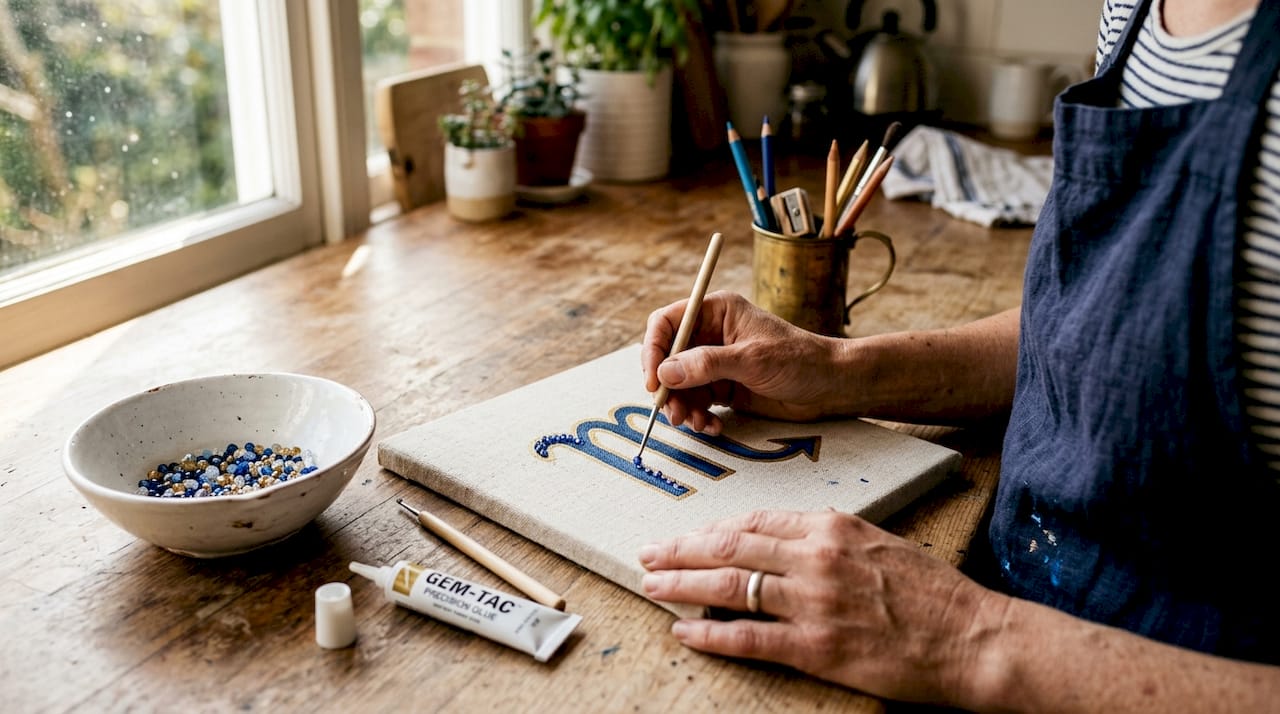
- Add details and accents. Use metallic markers or a fine brush with gold or silver paint to trace constellation lines, dot star points, or outline your glyph. This is where the magic really shows up.
- Let everything dry completely. Give the piece at least two hours before touching it, and 24 hours before adding any dimensional elements or hanging hardware.
- Secure hanging hardware. Attach a sawtooth bracket or D-ring to the back with screws. For lighter cardboard pieces, two strips of heavy-duty adhesive strips work well.
- Hang and assess. Step back and evaluate at eye level. Adjust tilt or height as needed before committing to nail holes.
For styling zodiac posters alongside your DIY pieces, remember that mixing handmade and printed art in the same gallery wall adds richness and depth.
A moon phases project adapts easily to this framework. In step three, you divide your surface into eight equal sections and sketch each phase from new moon to full moon and back. The result is a cohesive series that feels both scientific and deeply personal.
Important safety note: When using a glue gun, work on a heat-safe surface and keep a glass of water nearby. Hot glue burns are one of the most common DIY injuries. Let dimensional elements cool completely before repositioning them.
Pro Tip: Add dimensional elements like small crystal beads, dried pressed flowers, or textured modeling paste to select areas of your piece. Even a small raised element catches light differently and instantly elevates a flat painting to gallery-style decor.
Once your artwork is complete, it’s smart to avoid common missteps. Here’s how.
Troubleshooting and avoiding common mistakes
Even experienced crafters run into trouble. The key is catching problems early and knowing when a small fix is enough versus when to start a section over. Understanding what zodiac art is meant to communicate also helps you stay focused on intention rather than perfection.
Common mistakes and how to fix them:
- Overcluttered design. Too many motifs competing for attention makes the piece feel chaotic. Fix it by choosing one primary element (a glyph, a constellation, or a moon phase) and letting everything else support it.
- Poor paint adhesion. Paint beading up or peeling after drying usually means the surface wasn’t primed. Apply a thin layer of gesso to canvas or wood before painting. For cardboard, two coats of white acrylic serve the same purpose.
- Insufficient wall support. A heavy canvas with only adhesive strips will eventually fall. Always use a proper wall anchor for pieces over 2 pounds. Check your hanging hardware weight rating before installing.
- Mismatched room style. A piece that looks great in isolation can clash with existing decor. Zodiac motifs and palettes work best when they tie back to the room’s existing colors and lighting preferences rather than following astrology conventions rigidly.
- Symmetry gone wrong. Constellation dots or moon phases that aren’t evenly spaced look unfinished. Use a ruler and light pencil marks to map spacing before painting.
If you’ve made a mistake that’s too far along to erase, don’t panic. A coat of white or background-colored paint over the problem area resets the surface. Once it’s dry, repaint the section with fresh eyes.
Pro Tip: Before finalizing any layout, cut paper shapes to represent each element and tape them to the wall temporarily. This gives you a real sense of scale and balance without commitment.
Ready to see it all come together? Let’s recap what success looks like and how to personalize your creation further.
Showcasing your creation and thoughtful gift ideas
A finished piece deserves a thoughtful display. How and where you hang your zodiac art is almost as important as how you made it. Done well, it transforms a random wall into a statement.
Tips for hanging, grouping, and framing:
- Hang your primary piece at eye level, roughly 57 to 60 inches from the floor to the center of the artwork
- Group two or three pieces in a horizontal line above a console table or sofa
- Mix frame styles intentionally, unfinished wood next to black metal, for an eclectic but curated look
- Use picture rail hooks in older homes to avoid unnecessary holes in plaster walls
- Add a small plant or candle on a nearby shelf to extend the celestial theme into the space
Creating a series of pieces for different signs is one of the most thoughtful personalized zodiac gift ideas you can offer friends and family. Imagine gifting a Scorpio friend a deep burgundy and gold glyph print, or a Sagittarius a constellation map in forest green and copper. The personalization feels intentional in a way that a generic store-bought gift simply can’t replicate.
| Recipient’s sign type | Recommended craft approach | Personalization idea |
|---|---|---|
| Earth signs (Taurus, Virgo, Capricorn) | Precise, structured constellation map | Add their birth date below the star chart |
| Water signs (Cancer, Scorpio, Pisces) | Fluid watercolor moon phase piece | Include a meaningful quote in their favorite color |
| Fire signs (Aries, Leo, Sagittarius) | Bold glyph with metallic accents | Incorporate their ruling planet symbol |
| Air signs (Gemini, Libra, Aquarius) | Geometric layered constellation | Layer two signs for couples or best friends |
For even more creative astrology gifts, consider matching the zodiac theme to the person’s craft style, with giftable zodiac projects working best when they reflect the maker’s own creative preferences. A precise, detail-oriented person will love a structured constellation map. A free-spirited friend will appreciate a watercolor moon phase piece. Adding a name, a date, or even a short personal note to the back of the piece turns it from a craft project into a keepsake.
After reviewing these creative possibilities, let’s dig deeper on what most DIY guides miss.
Why creativity matters more than astrological accuracy
Here’s an honest perspective that most zodiac decor articles skip entirely. The obsession with getting the “right” colors, motifs, and symbols for each sign can actually stop people from creating anything at all. Perfectionism dressed up as authenticity is still perfectionism. And it gets in the way of making something genuinely personal and beautiful.
The truth is, zodiac motifs and palettes are guidelines that the home decor world uses as a creative framework, not a rulebook. Nobody is going to look at your Pisces-themed art and say it’s wrong because you used warm tones instead of sea blue. What they will feel is the intention behind it, the care, the specificity.
The most meaningful wall art we’ve seen people create bends every convention imaginable. A Capricorn who loves vibrant color. An Aries who prefers soft, minimal lines. A Gemini who makes one cohesive, focused piece. When you prioritize personal connection over symbolic accuracy, the result is always more interesting. Ways zodiac posters elevate decor aren’t about whether you got the planetary colors right. They’re about creating something in your space that feels unmistakably like you.
Your DIY zodiac wall art is an experiment, and experiments are allowed to surprise you.
Find more inspiration and ready-to-make zodiac art
If this guide has sparked your creative energy, there’s even more waiting for you.

At Wallfully.com, you’ll find a curated collection of personalized zodiac wall art, step-by-step tutorials, and customizable prints you can tailor with names, dates, and color choices. Whether you want to create something entirely from scratch or start with a beautifully designed template and make it your own, there’s something for every creative level. Browse zodiac art for every sign, explore ideas organized by room type and decor style, and find the perfect print to pair with your handmade piece or gift to someone you care about. Free shipping on all orders and a satisfaction guarantee make it easy to try something new.
Frequently asked questions
Which zodiac signs are best for DIY wall decor projects?
Every sign works beautifully as a starting point for DIY decor. The key is matching the zodiac theme to your craft preferences rather than following any single formula.
Do I need to follow astrology chart rules for authentic zodiac wall art?
Not at all. Zodiac decor motifs and palettes are meant to be a personal creative lens, not a rulebook, so feel free to bend them to suit your taste and room.
What is the easiest zodiac motif for DIY beginners?
Moon phases, simple constellations, and zodiac glyphs are ideal for beginners. Sketching moon phases evenly, painting each section, and assembling the piece requires only basic painting skills and minimal supplies.
How can I make sure my DIY wall art fits my room?
Tie your color choices and motifs back to your room’s existing palette and lighting. Using zodiac inspiration for mood and palette while anchoring the design to your real space ensures the piece feels cohesive rather than out of place.