Create meaningful personalized home decor with expert tips
WallfullyYou’ve carefully selected the perfect photo, uploaded it with excitement, and ordered a custom print for your living room. When it arrives, your heart sinks. The image looks blurry and pixelated, nothing like what you envisioned. You checked the DPI was 300, so what went wrong? The truth is, DPI alone doesn’t determine print quality. Understanding how image resolution, print size, and viewing distance work together transforms your ability to create stunning personalized wall art that truly honors your memories and elevates your home.
Table of Contents
- Understanding Print Resolution And DPI Misconceptions
- How To Match Image Resolution And Print Size For Sharp, Meaningful Decor
- Design Strategies To Make Personalized Home Decor Truly Meaningful
- Best Practices For Preparing Images And Ordering Prints For Personalized Decor
- Find Meaningful Personalized Home Decor At Wallfully
- Frequently Asked Questions
Key takeaways
| Point | Details |
|---|---|
| DPI is not a quality measure | DPI indicates printing density but doesn’t add detail to images with insufficient pixel dimensions for the intended print size. |
| Resolution must match print size | A 16×20 inch print needs roughly 4800×6000 pixels at 300 PPI to appear sharp when viewed up close. |
| Viewing distance affects requirements | Posters viewed from several feet away can use lower pixel density than framed photos examined closely. |
| File preparation prevents disasters | Checking pixel dimensions and avoiding compression artifacts ensures your personalized decor looks crisp and meaningful. |
Understanding print resolution and DPI misconceptions
DPI stands for dots per inch, a measurement that describes how many ink dots a printer places within one linear inch. Many people mistakenly treat DPI as a quality metric, assuming a 300 DPI file automatically produces sharp prints. This misconception causes frustration when beautifully designed personalized wall art arrives looking fuzzy.
The real determinant of sharpness is pixel dimensions combined with physical print size. A 1000×1000 pixel image contains exactly one million pixels, period. Changing the DPI metadata tag from 72 to 300 doesn’t magically create more pixels or add detail. DPI is a rendering instruction, an AI image generated at a fixed pixel size contains a fixed information ceiling that DPI alone cannot enhance. The actual measure affecting print sharpness is PPI, pixels per inch, which describes how many image pixels fit into each inch of the printed surface.
Consider this scenario. You have a 3000×3000 pixel photo. Print it at 10×10 inches, and you get 300 PPI, producing crisp detail. Print that same file at 20×20 inches, and you get 150 PPI, resulting in visible pixelation when viewed closely. The image file didn’t change, but spreading those pixels across a larger area reduced sharpness.
Common misconceptions about print quality include:
- Believing higher DPI settings in software improve image detail
- Assuming all 300 DPI files print equally sharp regardless of size
- Thinking you can enlarge small images without quality loss
- Confusing screen resolution with print resolution requirements
“The DPI tag is metadata. What matters is whether your image has enough pixels to cover your intended print dimensions at an acceptable PPI for the viewing distance.”
When creating types of wall art printing for your home, focus on pixel dimensions first. A smartphone photo might be 4000×3000 pixels, perfect for an 8×10 inch print at high quality but marginal for poster sizes. Print on demand wall art services need sufficient source resolution to deliver the meaningful, sharp decor you envision. Avoid over-compressing files, as this destroys fine details that no DPI setting can restore.
How to match image resolution and print size for sharp, meaningful decor
Creating personalized home decor that looks professional starts with calculating the right pixel dimensions for your intended print size. This ensures your custom art honors special memories with clarity rather than disappointing blur.
![]()
Measure your desired print size before selecting images. A common living room size is 16×20 inches, while smaller spaces might need 8×10 or 11×14 prints. Knowing the exact dimensions lets you determine minimum pixel requirements.
Follow these steps to calculate required resolution:
- Decide your target PPI based on viewing distance (typically 200-300 PPI for wall art)
- Multiply print width in inches by target PPI to get minimum pixel width
- Multiply print height in inches by target PPI to get minimum pixel height
- Verify your source image meets or exceeds these pixel dimensions
- If the image falls short, consider a smaller print size or find a higher resolution source
Sharpness in print depends on both physical size and minimum acceptable PPI; a 16×20 inch print at 300 PPI needs 4800×6000 pixels. This calculation reveals why larger prints demand exponentially more pixels. A 24×36 inch poster at the same quality standard requires 7200×10800 pixels, nearly four times the total pixel count of the smaller print.
Recommended PPI values vary by application:
| Viewing Distance | Recommended PPI | Best For |
|---|---|---|
| Very close (under 1 foot) | 300-400 PPI | Framed photos, detailed art |
| Normal (2-4 feet) | 200-250 PPI | Wall art, personalized posters |
| Far (5+ feet) | 150-180 PPI | Large canvas prints, banners |
Larger prints viewed from across a room can use lower PPI without appearing blurry because your eye can’t distinguish individual pixels at distance. A massive 40×60 inch canvas in your living room looks stunning at 150 PPI when viewed from the sofa, while that same PPI would look terrible on an 8×10 photo examined up close.
Never attempt to upscale low resolution images through software interpolation. Adding artificial pixels creates a soft, blurry appearance rather than genuine sharpness. If your treasured photo is only 1500×2000 pixels, accept a smaller print size or explore alternative custom artwork tips that work within the limitations.
Pro Tip: Right click any digital image file on your computer and select Properties or Get Info to view exact pixel dimensions before ordering prints. This 30 second check prevents costly disappointments.
Design strategies to make personalized home decor truly meaningful
Technical precision creates sharp prints, but thoughtful design transforms wall art into meaningful expressions of your life and style. Combining correct resolution with intentional creative choices elevates personalized decor from generic to genuinely special.

Color selection dramatically impacts emotional resonance. Warm tones like amber, coral, and cream create cozy, inviting atmospheres perfect for family photos or nostalgic memories. Cool blues and greens evoke calm and serenity, ideal for bedroom or meditation space decor. Consider your existing room palette when customizing prints. A vibrant sunset photo pops beautifully against neutral walls, while black and white portraits add sophisticated contrast to colorful spaces.
Composition guides the viewer’s eye and tells your story effectively. The rule of thirds places key elements at intersecting points rather than dead center, creating dynamic visual interest. For milestone prints celebrating births, weddings, or anniversaries, incorporate meaningful text placement that complements rather than overwhelms imagery. Balance negative space with detailed areas to prevent cluttered, chaotic designs.
Theme consistency across multiple pieces creates cohesive gallery walls. A travel themed collection might include map prints of visited cities, landmark photos, and typography featuring adventure quotes. Family focused displays could combine generational portraits, handprint art, and milestone dates arranged chronologically. The design role in personalized art extends beyond individual pieces to how they interact within your space.
Photo collages and mixed media offer unique creative expression impossible with single images. Combine multiple vacation snapshots into a unified composition that tells the complete story of your journey. Layer textures, patterns, and graphics with personal photos for contemporary, magazine quality results. These formats work exceptionally well for gifts, allowing you to incorporate numerous meaningful moments into one stunning piece.
Coordinate wall art with room lighting to maximize impact. Natural light enhances vibrant colors and fine details during daytime hours. Position prints to avoid direct sunlight that causes fading over time. For evening ambiance, consider how artificial lighting affects color temperature. Warm bulbs intensify reds and yellows, while cool LEDs enhance blues and whites.
Harmony between technical quality and creative design produces the most satisfying results. A perfectly sharp but poorly composed image disappoints as much as a beautifully designed but blurry print. Invest equal attention in both aspects.
Pro Tip: Use digital mockup tools to preview how your personalized art looks in your actual room before printing. Upload a photo of your wall, then overlay your design at scale to evaluate size, placement, and color harmony with existing decor.
Best practices for preparing images and ordering prints for personalized decor
Proper file preparation separates amateur results from professional quality personalized wall art. Following systematic steps ensures your meaningful memories translate into stunning physical prints.
Start by organizing and evaluating source images. Gather all photos or graphics you plan to use, then assess their quality at full size on your computer screen. Zoom to 100% magnification to check for blur, noise, or compression artifacts. Discard any images that appear soft or pixelated, as these flaws magnify dramatically in prints.
Check technical specifications before uploading:
- Verify pixel dimensions meet or exceed requirements for your chosen print size
- Confirm file format is JPEG or PNG without excessive compression
- Review color mode settings, ensuring RGB for digital printing (not CMYK unless specified)
- Inspect metadata to understand original capture settings and any editing history
- Create backup copies of original files before making any modifications
JPEG versus PNG format choice affects quality preservation. JPEG uses lossy compression that reduces file size by discarding visual information. Each time you save a JPEG, quality degrades slightly. PNG employs lossless compression, maintaining perfect quality but creating larger files. For photographs with smooth color gradients, JPEG at maximum quality (90-100%) works well. For graphics with sharp edges, text, or transparent backgrounds, PNG preserves crisp details better.
| Format | Best For | Compression | File Size |
|---|---|---|---|
| JPEG | Photos, gradients | Lossy | Smaller |
| PNG | Graphics, text, transparency | Lossless | Larger |
Avoid destructive editing mistakes. Never repeatedly save and resave JPEGs, as this compounds quality loss. Don’t attempt to enlarge images beyond their native resolution through resampling or interpolation. Resist the temptation to apply excessive sharpening filters, which create unnatural halos and grain. Print sharpness depends on pixel density relative to viewing distance and avoiding compression artifacts.
Communicate clearly with print providers about your requirements. Specify exact dimensions, preferred paper type, and finish (matte, glossy, or satin). Ask about their recommended file specifications and upload guidelines. Reputable services provide detailed technical requirements and offer proof previews before final printing.
Common errors that ruin print quality include:
- Uploading images with insufficient pixel dimensions for the ordered size
- Using heavily compressed files downloaded from social media
- Failing to crop images properly, resulting in unwanted borders or cut off elements
- Selecting incorrect color profiles that shift hues in the final print
Preview your design at actual size whenever possible. Many custom print guides recommend viewing files at 100% zoom to simulate how details render in physical form. For photo collage preparation, ensure individual images within the composition maintain adequate resolution when scaled to their final positions.
Order a small test print before committing to large, expensive sizes. An 8×10 proof reveals color accuracy, sharpness, and overall quality for minimal cost. This investment prevents disappointment and wasted money on full size prints that don’t meet expectations.
Find meaningful personalized home decor at Wallfully
Transforming your understanding of print quality into beautiful reality becomes effortless with the right partner. Wallfully specializes in creating customizable wall art that captures your unique stories, memories, and style with exceptional clarity and craftsmanship.
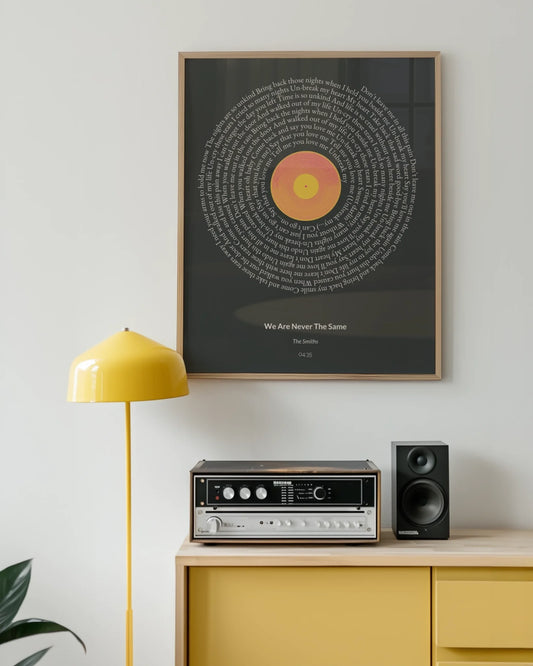
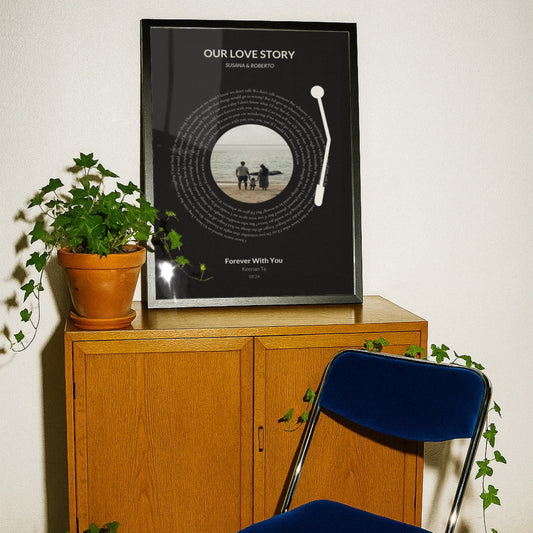
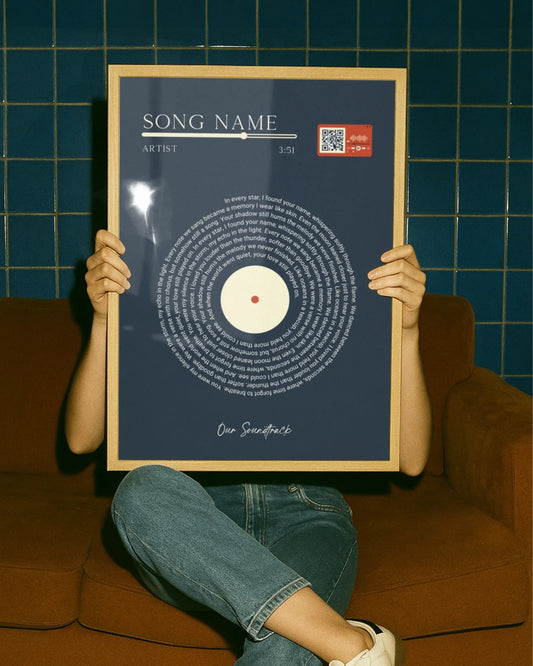
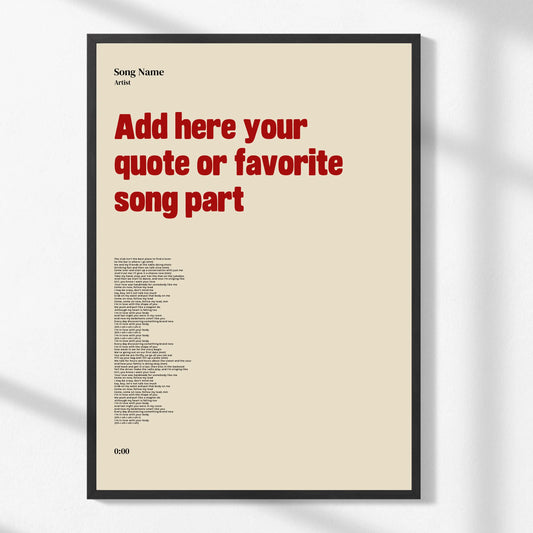
Every design starts with your vision. Choose from song lyric posters that commemorate your wedding song, custom map prints marking where you met or married, photo collages celebrating family milestones, zodiac art reflecting personality, or anniversary prints honoring years together. The intuitive customization process guides you through adding names, dates, locations, and personal touches that make each piece genuinely yours.
High quality printing backed by expert techniques ensures your personalized decor looks crisp and vibrant. Wallfully’s team understands the resolution requirements, color management, and material selection that transform digital designs into museum quality physical art. Eco-friendly materials and archival inks guarantee your meaningful pieces remain beautiful for decades.
Ordering is simple regardless of your technical expertise. Upload your images, customize your design with real time previews, and receive guidance on optimal sizes and formats. Free shipping on all orders removes cost barriers, while satisfaction guarantees provide peace of mind. Whether you’re decorating your own home or creating heartfelt gifts for loved ones, Wallfully delivers personalized wall art that truly matters.
Frequently asked questions
What is DPI and why does it matter for personalized home decor?
DPI measures how many ink dots a printer places per inch on paper, controlling print density but not image detail. The confusion arises because people conflate DPI with image quality, when pixel dimensions and PPI actually determine sharpness. Your source image must contain enough pixels to cover your intended print size at adequate PPI, typically 200 to 300 pixels per inch for wall art viewed at normal distances. Simply setting a high DPI value in software doesn’t add pixels or improve quality if the underlying image lacks sufficient resolution.
Can I save a low resolution image by increasing its DPI before printing?
No, changing the DPI metadata tag doesn’t add real detail to images with insufficient pixels. A 1000×1000 pixel file remains exactly that regardless of whether you label it 72 DPI or 300 DPI. Printing it larger by increasing DPI just spreads those same pixels across more area, making pixelation more visible. The only solution for small images is accepting a smaller print size that keeps PPI high enough for sharpness, or finding a higher resolution version of the image.
How do I calculate the minimum resolution needed for my print size?
Multiply your desired print dimensions in inches by your target PPI to determine minimum pixel requirements. For example, a 16×20 inch print at 250 PPI needs at least 4000×5000 pixels (16×250 by 20×250). Check your image’s actual pixel dimensions by viewing file properties on your computer. If the image falls short, either reduce your print size or choose a different image with higher resolution to ensure sharp, professional results.
What design elements make personalized home decor more meaningful?
Select images that hold genuine personal significance, like photos from important life events or places with emotional connections. Use color palettes that harmonize with your existing interior decor to create cohesive, intentional spaces rather than disconnected wall clutter. Incorporate themes and styles that resonate with recipients for gifts, such as vintage aesthetics for nostalgia lovers or minimalist designs for contemporary tastes. Consider creative formats like photo collages that combine multiple meaningful moments into unified compositions, or mixed media that layers personal photos with graphics and text for unique artistic expression.
How can I ensure my personalized decor prints come out sharp and clear?
Verify your source image contains pixel dimensions that meet or exceed the required PPI for your chosen print size and viewing distance. Avoid using images downloaded from social media or heavily compressed files, as these contain artifacts that magnify in prints. Preview your design at 100% zoom on your computer screen to detect any blur or pixelation before ordering. Choose high quality file formats like PNG for graphics or maximum quality JPEG for photos. Consult your print provider’s technical guidelines and consider ordering a small test print first to confirm color accuracy and sharpness before committing to larger, more expensive sizes.