7 Smart Ways to Display Wall Art for a Personalized Home
WallfullyFinding the perfect way to display your personalized wall art can feel overwhelming. You want your space to look inviting and stylish, not cluttered or mismatched. The challenge is knowing which display techniques truly make your artwork stand out, last longer, and reflect your taste. Every room and print is different, so one method won’t fit all.
This guide gives you practical strategies that go beyond simply hanging a frame. You will discover options that increase visibility, maximize impact, and showcase your art while keeping it safe from damage. These proven insights—from choosing the right placement to creative seasonal refreshes—are designed to help you create a display you love coming home to. Get ready to unlock ideas that turn your wall art into a statement and make every piece matter.
Table of Contents
- 1. Choose The Right Placement For Maximum Impact
- 2. Create A Gallery Wall For Visual Interest
- 3. Use Floating Shelves For Flexible Displays
- 4. Mix And Match Frames For Unique Style
- 5. Incorporate Personalized Prints And Posters
- 6. Highlight Art With Proper Lighting
- 7. Refresh Displays With Seasonal Changes
Quick Summary
| Key Insight | Detailed Explanation |
|---|---|
| 1. Choose optimal placement for art | Position artwork based on light, eye level, and surrounding furniture to enhance its visibility and impact. |
| 2. Create a cohesive gallery wall | Mix different art pieces together thoughtfully for visual interest and narrative, ensuring frames and themes complement one another. |
| 3. Utilize floating shelves for flexibility | Floating shelves allow for seasonal updates and flexible arrangements, keeping your display dynamic and personalized. |
| 4. Mix frame styles for unique displays | Combining varying frame types and colors adds depth and character to your wall art, making displays feel curated rather than chaotic. |
| 5. Refresh displays with seasonal changes | Rotate your artwork seasonally to align with nature’s rhythms and bring fresh energy to your space throughout the year. |
1. Choose the Right Placement for Maximum Impact
Wall art only works when it’s in the right spot. The location you choose can transform a beautiful print from something people glance past to a conversation starter that anchors your entire room. Placement isn’t just about finding an empty wall and hanging something there—it’s about understanding light, sightlines, eye level, and how your artwork relates to the furniture and architectural features around it.
Light plays a bigger role than most homeowners realize. Natural light from windows can either showcase your wall art beautifully or wash it out completely. Consider where the sun travels through your room at different times of day. An artwork positioned where afternoon light hits it directly might get a reflective glare that obscures the details you customized so carefully. Conversely, placing a piece in a darker corner might make the colors feel muted. Think about artificial lighting too—strategic wall sconces or accent lights can actually enhance how your personalized print appears in the evening. When selecting appropriate mounting techniques, remember that professional framers often recommend placement that balances visibility with protection from direct sun exposure, which fades colors over time.
Eye level matters more than you might think. Standard gallery placement puts the center of artwork at approximately 57 to 60 inches from the floor—roughly at eye level for an average adult. This positioning makes viewers naturally engage with your print without straining their neck or searching for it. However, the right height depends on context. Above a sofa, you might hang artwork slightly higher to account for people sitting down. In entryways, placing art a touch higher than standard eye level creates a welcoming sense of openness. If you’re creating a display environment that maximizes visual impact, consider the spacing from surrounding elements—leave at least 8 to 10 inches between your frame and adjacent furniture or architectural features for breathing room.
Think about what you want the artwork to do in the space. Is it a focal point that draws the eye immediately upon entering? Then place it prominently on the wall people see first. Is it a complementary piece that adds personality without dominating? Then positioning it beside functional pieces like bookshelves or mirrors works beautifully. Personalized pieces like custom photo collages or milestone prints often become emotional anchors in a room, so placing them where you’ll see them regularly—maybe in your bedroom, home office, or living room—ensures they deliver the daily joy you designed them for.
Pro tip: Use painter’s tape to create a template of your frame size on the wall and live with it for a few days before hanging to see how the placement feels in different lighting conditions and times of day.
2. Create a Gallery Wall for Visual Interest
A gallery wall transforms a blank stretch of wall into a dynamic focal point that tells your story. Rather than hanging a single piece of art, you arrange multiple prints, photos, and personalized pieces together to create visual depth and interest. This approach works because your eye moves across the collection, discovering details and making connections between each element. The beauty of a gallery wall is that it lets you combine different themes, sizes, and styles while maintaining cohesion through thoughtful arrangement and shared design elements.
When you arrange multiple pieces together, you’re not just decorating a wall—you’re creating a narrative. Combining custom photo collages with personalized milestone prints, song lyric posters, or zodiac sign artwork allows you to layer meaning and personal significance into one space. Arranging images at various scales and themes engages viewers and encourages them to spend time exploring each piece. Start by laying all your frames out on the floor in different configurations before hanging anything. This lets you experiment with balance and spacing without committing nail holes. Some people prefer symmetrical layouts with evenly spaced rows and columns, while others love the organic feel of asymmetrical arrangements where pieces vary in size and positioning. Both approaches work—it depends on your space and personal aesthetic. The key is ensuring your pieces feel intentionally grouped rather than randomly scattered.
Color and theme create visual coherence across your gallery wall. You might build your wall around a color palette like warm neutrals with pops of navy, or cool grays with rose gold accents. Alternatively, tie everything together through theme—a wall celebrating family memories using photo prints and personalized date markers, or a collection celebrating your passions with custom prints alongside meaningful quotes. Creating a layout that maximizes visual appeal in tight spaces shows how spacing and arrangement directly influence how viewers experience your wall. Leave breathing room between frames so each piece stands out while contributing to the whole. Plan for about 2 to 3 inches between frames for a cohesive gallery wall that feels intentional. If you’re working with an odd number of pieces or unconventional sizes, stand back frequently to assess balance from across the room where people will actually view your creation.
Pro tip: Use kraft paper templates cut to match your frame sizes and tape them to your wall first, then mark nail positions and remove the templates before you start hanging—this approach saves you from making unnecessary holes while perfecting your layout.
3. Use Floating Shelves for Flexible Displays
Floating shelves offer a modern, adaptable way to display your personalized wall art and collectibles without the commitment of permanent wall arrangements. Unlike traditional framed displays that stay fixed in one spot, floating shelves let you rotate pieces seasonally, rearrange based on mood, and adjust your display as your collection grows. They create visual interest while keeping your floor space open and uncluttered, which makes them ideal for smaller rooms or homes where every square foot counts. The beauty of this approach is that you control exactly how your art gets showcased and can change it whenever inspiration strikes.
When you use floating shelves for displaying artwork, you’re creating layers of visual depth that draw the eye upward and around your room. The key to success is balancing weight distribution and mixing heights to prevent your shelves from looking heavy or monotonous. Arrange pieces so that taller items anchor one end while smaller prints or objects fill the remaining space, creating a sense of movement across the shelf. Utilizing variations in height and texture creates visually appealing arrangements that feel intentional rather than accidental. Consider pairing personalized photo prints with complementary objects like small potted plants, books, or decorative items that relate to your prints’ themes. A shelf displaying custom song lyric posters might feature vinyl records or concert memorabilia. A shelf holding milestone prints could include relevant keepsakes or small frames with dates. This layering approach prevents your display from feeling one-dimensional while telling a richer story about what matters to you.
The flexibility of floating shelves means you can experiment without guilt. Swap out prints based on seasons, holidays, or simply when you want a fresh look. You might display your favorite personalized zodiac sign art one month and rotate in a new custom photo collage the next. This adaptability makes floating shelves perfect for people who love updating their spaces frequently or who struggle to commit to permanent wall arrangements. Install shelves at varying heights across your wall to create movement and visual rhythm. Start with your shelves measuring about 12 to 18 inches apart vertically, which gives you plenty of room for substantial pieces while maintaining balance. Over time, you’ll develop an intuition for what looks right in your specific space and lighting conditions.
Pro tip: Before permanently installing your floating shelves, use temporary adhesive strips to hold lightweight prints at various heights and positions for a week to see how your eye naturally travels across the wall.
4. Mix and Match Frames for Unique Style
Matching all your frames is boring. The most visually interesting displays happen when you break the rules and combine different frame styles, colors, and textures that work together as a cohesive collection. Mixing frames might seem chaotic at first, but when done thoughtfully, it creates personality and depth that a uniform set never achieves. Your personalized wall art deserves frames that reflect your individual style rather than forcing everything into a one-size-fits-all aesthetic.
The secret to successful frame mixing is understanding how to maintain harmony while embracing variety. Think about what ties your frames together rather than what separates them. You might choose frames in different colors but keep them all within a similar material family like wood or metal. Another approach involves varying the frame width and style but anchoring everything through a unified color palette—perhaps mixing sleek black frames with warm walnut wood frames, both grounding your display in neutral tones. Incorporating different frame styles and textures adds depth and character while maintaining visual harmony through thoughtful scale and spacing. The goal is creating intentional variety rather than accidental mismatch. Consider the proportions too. If you’re displaying a large custom photo collage in a substantial wooden frame, balance it with smaller prints in complementary frames rather than surrounding it with frames of identical width. This creates visual rhythm that keeps your eye moving across the display.
Personalized prints give you the perfect opportunity to experiment with frame combinations. A song lyric poster in a sleek black frame might sit beautifully next to a milestone print in a rustic wooden frame, especially if both prints connect thematically or chronologically in your life story. A zodiac sign print in a modern metal frame could complement a custom family photo in a vintage-style frame if they share a color story. Creating customizable displays using different frame styles lets you refresh your look seasonally or as your tastes evolve. Start by selecting your primary frame style, then introduce one or two complementary styles that feel like intentional choices rather than afterthoughts. Odd numbers work well in frame mixing—three different frame styles feel curated, while five different styles might feel scattered. Stand back frequently as you arrange to see how your mixed frames interact with each other and how they frame the art itself.
Pro tip: Create a mood board using photos of your prints and gather actual frame samples or printed images of potential frames in different styles, then arrange them virtually or physically to test combinations before committing to purchases.
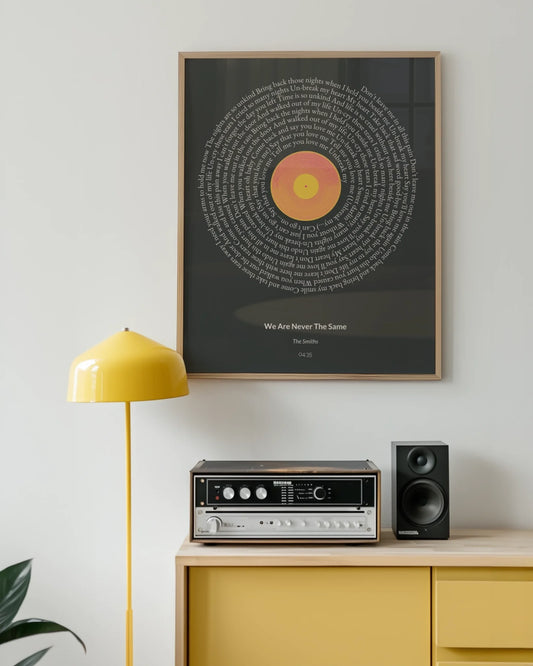
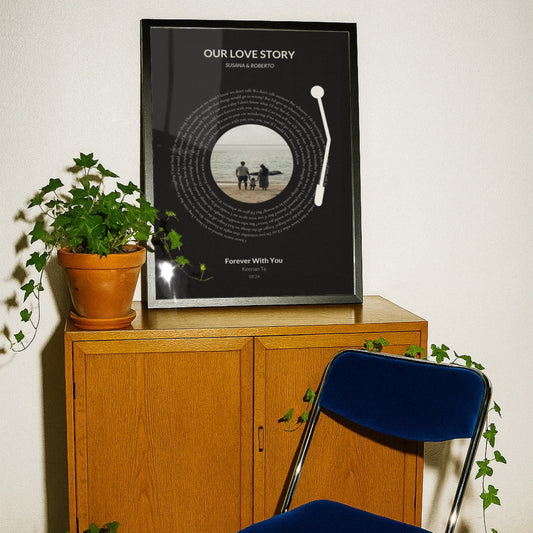
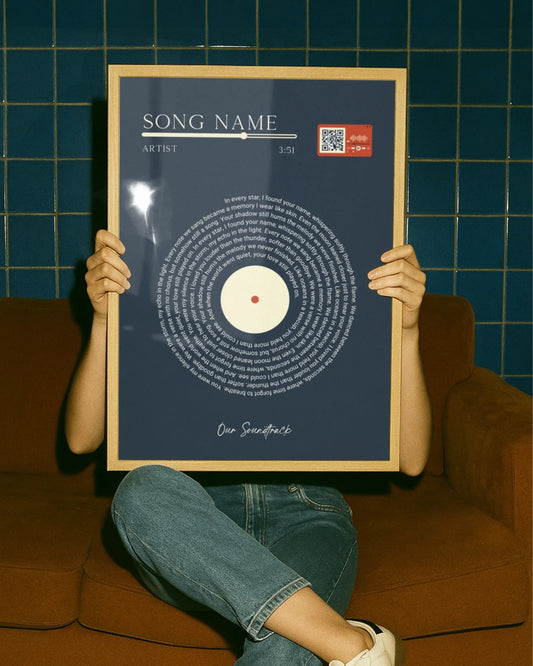
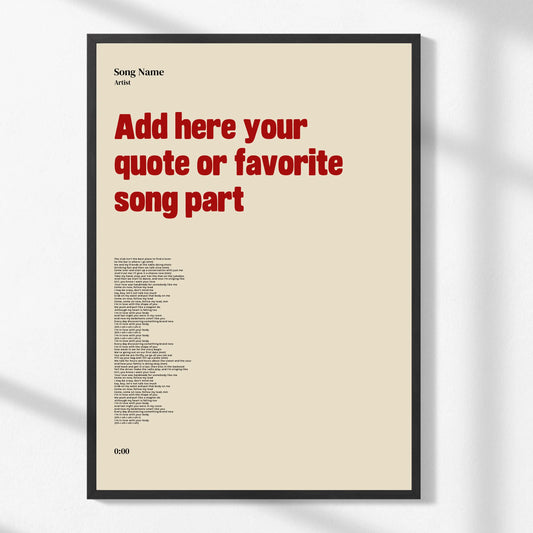
5. Incorporate Personalized Prints and Posters
Personalized prints and posters transform your walls from generic to genuinely meaningful. Unlike mass-produced art that anyone can buy, customized pieces reflect your memories, values, and personality. You might display a song lyric poster featuring your favorite band’s most meaningful lyrics, a custom photo collage showcasing family moments, or a personalized zodiac sign print that celebrates who you are. When your wall art tells your story, your home becomes more than just a place to live—it becomes a reflection of you.
The power of personalized art lies in its ability to create emotional connection in your space. Custom prints elevate modern home decor because they combine meaningful content with thoughtful design. You control every element, from the specific photos included in a collage to the colors and fonts used in a custom poster. This level of customization means you can match your existing décor style while adding deeply personal meaning. A milestone print celebrating an anniversary or birthday becomes a permanent fixture that marks an important moment in your life. A personalized date map showing where you met your spouse or where you lived during a significant chapter serves as both beautiful art and a conversation starter. The beauty is that these pieces can be updated, refreshed, or expanded as your life evolves and new moments deserve commemoration.
Incorporating personalized pieces strategically creates focal points and tells a cohesive visual story. Rather than filling every wall with custom art, select key locations for your most meaningful pieces. Perhaps one personalized print anchors your bedroom, while another celebrates your family in the living room. You might create a small gallery dedicated to milestone moments or a rotating display of seasonal personalized prints. The flexibility of customizable options means you can order prints in different sizes and formats to fit your vision perfectly. Consider how your personalized pieces interact with other décor elements and artwork. A custom zodiac print might pair beautifully with constellation maps or astronomy themed décor. A song lyric poster could sit alongside vinyl records or concert photography. When you choose what gets printed and displayed, you’re making intentional decisions that strengthen the overall narrative of your home.
Pro tip: Order samples or digital previews of your personalized prints in the exact colors and sizes you’re considering, then display them on your wall for several days before finalizing your purchase to ensure they truly work with your lighting and existing décor.
6. Highlight Art with Proper Lighting
Your personalized wall art only looks as good as the light shining on it. Even the most beautiful custom print or carefully curated gallery wall can fall flat in poor lighting. Strategic lighting transforms your artwork from background decoration into a genuine focal point that draws attention and showcases colors, textures, and details exactly as you intended. The right lighting approach depends on understanding how light interacts with your prints and what techniques work best in your specific room.
Light quality matters as much as light quantity. Natural light seems ideal, but it actually presents challenges for artwork display. Sunlight changes throughout the day, creating shifting shadows and glare that can wash out colors or make viewing uncomfortable. Direct sunlight also fades colors over time, which means your personalized print loses its vibrancy. This is where accent lighting becomes your solution. Using accent lighting specifically positioned on artworks enhances visual interest and emphasizes the colors and textures you chose during the customization process. Track lighting mounted on your ceiling or wall sconces positioned on either side of your print give you precise control over how your art appears. LED technology offers significant advantages here—it produces less heat than traditional bulbs, which protects your prints from heat damage, and it consumes less energy while providing excellent color rendering. When light hits your print at the correct angle, it illuminates every detail without creating harsh shadows or reflective glare that makes viewing unpleasant.
Positioning matters enormously. For framed prints, aim for lighting that comes from slightly above the artwork at a 30 to 45 degree angle. This approach minimizes glare while providing adequate illumination across the entire piece. If you’re displaying multiple prints in a gallery wall, consider whether each piece needs individual accent lighting or if one well-positioned light source can enhance several pieces simultaneously. Test different lighting scenarios before committing. Turn off overhead lights and experiment with table lamps, desk lamps, or clip-on lights positioned at different angles and distances. Your personalized zodiac print might look stunning with warm-toned lighting, while a photo collage might benefit from cooler, brighter light that makes details pop. Proper lighting design balances preservation with visibility while enhancing how viewers experience your artwork. Pay attention to how the lighting looks in both daylight and evening hours, since your prints will appear differently under various conditions throughout the day.
Pro tip: Install dimmable lights or lights on smart bulbs so you can adjust brightness and color temperature based on the time of day and create the perfect ambiance for viewing your personalized prints at any hour.
7. Refresh Displays with Seasonal Changes
Your home deserves to evolve with the seasons. While your core personalized wall art might stay year-round, refreshing your displays seasonally keeps your space feeling fresh and current. Seasonal rotations give you permission to experiment, swap pieces, and create new focal points without permanently altering your décor. This approach transforms your walls from static backgrounds into dynamic spaces that shift and breathe along with nature’s rhythms and your own changing moods and interests.
Seasonal changes influence how we experience our homes and the natural world around us. Spring invites lighter colors, renewal themes, and fresh energy into your space. Summer calls for brighter artwork and prints celebrating warmth and outdoor activities. Fall brings rich colors, harvest themes, and reflective moments. Winter offers opportunities for cozy displays, holiday celebrations, and introspective pieces. You might rotate your personalized prints to reflect these transitions, swapping a bright summer photo collage for a warmer, more intimate collection of prints as autumn approaches. Understanding seasonal biological events and how they influence our environments helps you create displays that feel connected to nature’s cycles. Consider which of your custom prints naturally align with different seasons. A zodiac sign print stays relevant year-round but gains new meaning as you move into months governed by different signs. A song lyric poster celebrating a summer anthem might rotate to holiday favorites as seasons change. Milestone prints marking seasons or holidays create automatic refresh points throughout the year.
Implementing seasonal rotations is simpler than you might think. Start by photographing your current displays so you can recreate them easily when you want to return to a favorite arrangement. Keep some personalized prints on floating shelves or in rotating frames that allow you to swap pieces without adding nail holes. Adjusting artwork to reflect seasonal themes and colors creates visual interest while aligning your home with natural cycles. Plan your transitions around natural break points like solstices and equinoxes, or align them with holidays and personal anniversaries. Store off-season prints carefully in protective sleeves or frames to preserve quality. You might dedicate one wall to seasonal displays while keeping other personalized pieces permanent, creating a balanced approach where your home feels fresh without becoming unrecognizable. The beauty of rotating displays is that each seasonal change feels like a mini home refresh, keeping your space exciting and engaging throughout the year while celebrating the natural transitions happening outside your windows.
Pro tip: Create a seasonal calendar marking when you want to refresh your displays, and prepare rotations in advance by organizing off-season prints together so you can swap everything in an afternoon rather than rushing when the season arrives.
Below is a summary table capturing the key strategies and considerations for effectively utilizing wall art as discussed in the article.
| Theme | Key Points | Insights |
|---|---|---|
| Placement | Choose locations considering light, sightlines, and surrounding elements. | Thoughtful placement enhances the impact and preserves the artwork’s integrity. |
| Eye Level | Position artwork at standard or adapted heights depending on context. | Ensures comfortable and aesthetic viewing for various scenarios. |
| Gallery Wall | Combine multiple pieces in cohesive arrangements for a dynamic narrative. | Offers depth and thematic expression while personalizing large wall spaces. |
| Floating Shelves | Utilize shelves for adaptable and layered displays. | Supports evolving decor needs while maintaining versatility. |
| Frame Mixing | Experiment with diverse frames to create a unique visual statement. | Encourages creativity and personal expression in forming collections. |
| Personalized Prints | Incorporate custom designs that narrate personal stories and values. | Adds a meaningful touch and emotional resonance to the decor. |
| Lighting | Employ strategic lighting to enhance and protect the visibility of wall art. | Proper lighting accentuates details and maintains the artwork’s vibrancy. |
| Seasonal Refresh | Update displays seasonally for a fresh and engaging environment. | Reflects changes in aesthetics aligning with the time of year. |
Transform Your Space with Personalized Wall Art from Wallfully
Struggling to find the perfect way to showcase your unique story on your walls? This article highlights challenges such as choosing the right placement, mixing frame styles, and using lighting to bring your personalized prints to life. Whether you want to create a striking gallery wall or keep your display flexible with floating shelves, the key is making your space truly yours by combining meaningful custom pieces.
Discover the joy of designing your own meaningful home decor with Personalized Wall Art – Custom Posters & Prints for any Occasion. From custom photo collages to milestone prints and song lyric posters, Wallfully makes it easy to bring your vision to reality. Start your creative journey today at Wallfully.com and unlock exclusive offers to personalize your home like never before. Don’t wait—elevate your walls with art as unique as your story now.
Frequently Asked Questions
How do I choose the right placement for my wall art?
Choosing the right placement for your wall art involves considering factors like eye level, lighting, and how it relates to surrounding furniture. Aim to position art at approximately 57 to 60 inches from the floor for optimal viewing. Experiment with temporary placements before committing to nails to ensure it feels right in various lighting conditions.
What can I include in a gallery wall to make it visually interesting?
To create an engaging gallery wall, mix different themes, sizes, and styles while maintaining a cohesive design. Combine personalized pieces like photo collages and milestone prints to layer meaning in the collection. Arrange your frames on the floor first to experiment with balance before hanging them on the wall.
How can I make my floating shelf displays flexible and appealing?
Float shelves allow for flexible displays of your art and collectibles. Aim to vary the heights and arrangements of the items on your shelves to create visual interest, mixing art with complementary objects like plants or books. This way, you can easily swap pieces in and out based on mood or season, refreshing your display whenever inspiration strikes.
What are effective ways to highlight my wall art with lighting?
To highlight your wall art effectively, use accent lighting to enhance colors and textures without causing glare. Position lights at a 30 to 45 degree angle above the artwork for the best results. Test different light sources, adjusting their intensity to create the desired ambiance for your personalized prints.
How can I incorporate seasonal changes into my wall art displays?
You can incorporate seasonal changes by swapping your personalized wall art to reflect the themes of the seasons. Plan to rotate your displays, such as changing a bright summer collage for warmer, fall-themed prints. Create a seasonal calendar to remind yourself when to refresh displays, keeping your home feeling current and inviting throughout the year.