Photo collage step guide: create personalized wall art
WallfullyTransforming cherished memories into personalized wall art or meaningful gifts starts with mastering the photo collage. Whether you want to celebrate a milestone, honor a relationship, or simply bring visual warmth to your living space, a well-crafted collage tells a story that resonates. This comprehensive guide walks you through every step of creating stunning photo collages in 2026, from selecting your theme and gathering materials to finalizing prints that capture hearts. You’ll discover practical design tips, avoid common pitfalls, and gain the confidence to turn your favorite photos into art that speaks volumes.
Table of Contents
- Preparing To Create Your Photo Collage
- Step-By-Step Instructions For Making A Digital Photo Collage In Photoshop
- Design Tips And Common Mistakes To Avoid For Stunning Photo Collages
- Finishing Touches And Sharing Your Photo Collage
- Create Your Unique Photo Collage With Wallfully
- FAQ
Key takeaways
| Point | Details |
|---|---|
| Define your theme first | A clear emotional theme unifies your photos and strengthens the story your collage tells. |
| Choose the right layout | Grid layouts offer modern structure while organic clusters create casual, dynamic energy. |
| Use digital tools wisely | Photoshop provides layer control, alignment precision, and flexible export options for prints or social media. |
| Balance colors and spacing | Harmonious color schemes and thoughtful spacing prevent visual clutter and enhance professionalism. |
| Proof before printing | Final review catches alignment issues, color inconsistencies, and ensures your collage looks polished. |
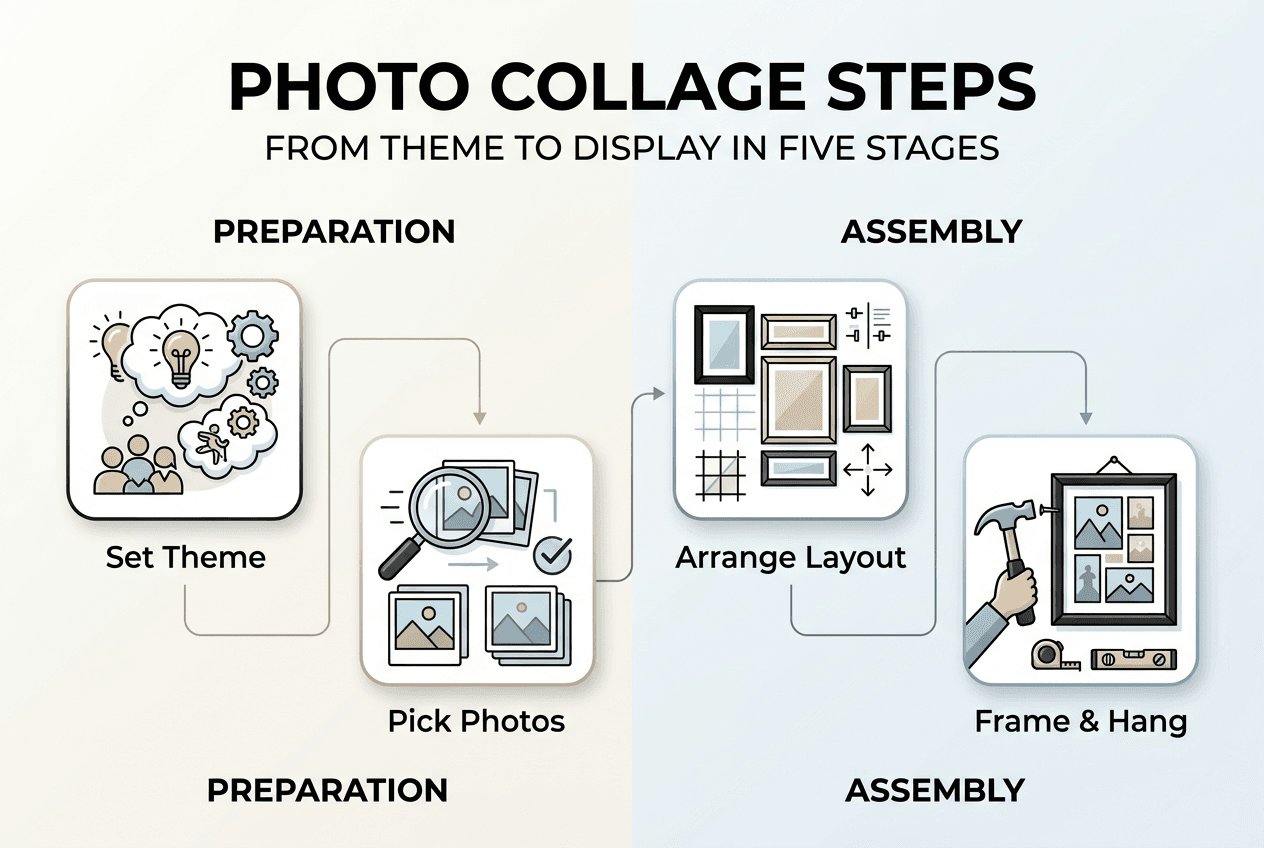
Preparing to create your photo collage
Successful collages begin long before you open editing software or pick up scissors. Preparation sets the foundation for a cohesive, visually compelling piece that resonates with viewers. The core of a successful photo collage lies in defining a theme, selecting visuals, and choosing a canvas, so invest time in this crucial planning phase.
Start by defining a clear emotional theme that unifies your photos. Are you celebrating a wedding, documenting a child’s first year, or showcasing travel adventures? Your theme guides every subsequent decision, from which photos make the cut to how you arrange them. A birthday collage might emphasize joy and celebration, while a memorial piece requires sensitivity and reverence. Write down three words that capture the mood you want to evoke.
Next, select photos that align with your theme and meet quality standards. Blurry, poorly lit, or compositionally weak images undermine your collage’s impact no matter how meaningful they are. Aim for variety in angles, distances, and subjects while maintaining thematic consistency. If you’re creating a family collage, mix candid moments with posed portraits to add visual interest.
Decide whether you’ll create a physical or digital collage based on your skills and intended use. Physical collages offer tactile satisfaction and work beautifully for scrapbook-style projects, but they lack the editing flexibility of digital formats. Digital collages let you experiment endlessly, adjust colors globally, and export multiple versions for different purposes. For those new to design photo collage guide techniques, digital often proves more forgiving.
Gather the tools you’ll need for your chosen format:
- Physical collages: Acid-free paper, photo-safe adhesive, precision scissors or craft knife, ruler, cutting mat, frame or mounting board
- Digital collages: Computer with sufficient RAM, editing software like Adobe Photoshop or free alternatives, high-resolution photo files, color-calibrated monitor for accurate preview
Selecting the right canvas size and shape proves critical to accommodating your photos and theme. Standard print sizes like 16x20 inches or 24x36 inches work well for wall display, while square formats suit Instagram sharing. Consider where your finished piece will live. A horizontal panorama fits above a sofa, while vertical orientations complement narrow wall spaces.
Pro Tip: Create a mood board with sample photos, color swatches, and layout sketches before committing to your final design. This preview helps identify potential issues and refines your vision.
| Preparation Step | Physical Collage | Digital Collage |
|---|---|---|
| Theme definition | Sketch ideas on paper | Create digital inspiration folder |
| Photo selection | Print test copies | Organize files in dedicated folder |
| Canvas choice | Purchase mounting board | Set up document in software |
| Tool gathering | Assemble craft supplies | Install and update software |
Step-by-step instructions for making a digital photo collage in Photoshop
Photoshop remains the gold standard for digital collage creation because of its precise control over every visual element. Photoshop provides control over collage elements such as layers, spacing, shapes, masks, alignment, colors, and export quality, making it ideal for both beginners following templates and advanced users crafting custom designs. Follow these steps to build your collage with professional polish.
-
Open Photoshop and create a new canvas sized appropriately for your intended use. For wall prints, use 300 DPI resolution at your desired dimensions (example: 20x30 inches at 300 DPI creates a 6000x9000 pixel canvas). For social media, 1080x1080 pixels at 72 DPI suffices for Instagram posts. Set your color mode to RGB for digital display or CMYK for professional printing.
-
Import your chosen photos by dragging image files directly onto your canvas or using File > Place Embedded. Each photo appears on its own layer in the Layers panel, giving you independent control over positioning, size, and effects. Name your layers descriptively (“beach sunset,” “family portrait”) to stay organized as your collage grows.
-
Choose a layout style that matches your theme and arrange photos accordingly. Grid layouts create modern, orderly compositions perfect for showcasing multiple moments equally. Freestyle arrangements feel organic and dynamic, ideal for storytelling. Scrapbook styles incorporate decorative elements and varied angles for nostalgic charm. Storyboard formats present images in chronological sequence. For photoshop collage step guide techniques, start simple and add complexity gradually.
-
Add layer masks and adjustment layers to blend photos harmoniously and correct exposure or color issues. Select a photo layer, click the mask icon at the bottom of the Layers panel, then use a soft brush to fade edges where photos overlap. Adjustment layers (Curves, Hue/Saturation, Vibrance) affect all layers below them, letting you unify disparate images shot in different lighting conditions.
-
Adjust colors or convert to monochrome for thematic consistency and visual harmony. A collage mixing warm sunset tones with cool indoor fluorescent lighting feels disjointed. Use Color Balance or Selective Color adjustments to shift all images toward a unified palette. Converting to black and white eliminates color distractions and emphasizes composition and emotion.
-
Use Photoshop’s spacing and alignment tools for balance and professional neatness. Select multiple layers, then click the alignment buttons in the top toolbar to distribute images evenly or align edges perfectly. The ruler guides (View > Rulers, then drag from the ruler onto your canvas) help maintain consistent margins and spacing throughout your design.
-
Export your final collage in high resolution suited for your intended purpose. For printing, use File > Export > Export As and choose JPEG at maximum quality or TIFF for lossless quality. For online sharing, export as JPEG at 80-90% quality to balance file size and visual fidelity. Save a master PSD file with all layers intact so you can make future edits.
Pro Tip: Work non-destructively by using Smart Objects for your photo layers. Right-click a layer and choose Convert to Smart Object before resizing or applying filters. This preserves original image quality if you need to scale up later.
“The beauty of digital collage creation lies in experimentation without consequence. Try ten different arrangements, save your favorites, and refine until your vision materializes perfectly.”
Design tips and common mistakes to avoid for stunning photo collages
Technical proficiency with software matters, but design principles separate amateur collages from gallery-worthy art. Understanding how layout choices, color relationships, and visual hierarchy influence viewer perception elevates your work dramatically. The choice of layout style significantly impacts the overall aesthetic of a photo collage, so choose deliberately based on your goals.
Grid layouts provide modern, orderly looks that suit professional portfolios, wedding albums, or any project requiring equal visual weight across images. The structured repetition creates rhythm and predictability, letting viewers absorb each photo without confusion. Organic clusters feel casual and dynamic, perfect for vacation memories or family gatherings where spontaneity matches the content. These arrangements mimic how we naturally group related items and encourage longer viewing as the eye wanders through the composition.
Color harmony transforms a collection of photos into a unified artwork. Stick to a color theme by selecting images that share dominant hues (all warm autumn tones, all cool blues and greens). Use accent colors consistently by repeating a bright element (red flowers, yellow clothing) throughout the collage to create visual connections. Monochrome conversion eliminates color conflicts entirely and emphasizes form, texture, and emotion. For photo collage layout styles that maximize impact, consider how colors interact across the entire composition.
Identical frames unify diverse photos visually by creating consistent boundaries and negative space. Whether you use physical frames or digital borders, matching width, color, and style signals that disparate images belong together. White frames feel clean and contemporary, black frames add drama and sophistication, while wooden frames bring warmth and organic texture.
Create hierarchy and focal points by using larger hero images that anchor your composition. The human eye naturally gravitates toward larger elements first, so place your most important or striking photo at a dominant size. Surround it with smaller supporting images that provide context or additional narrative detail. This prevents the “everything is equal” problem where no single element captures attention.
Common mistakes that undermine collage quality:
- Overcrowding: Cramming too many photos into limited space creates visual chaos and prevents any single image from breathing. Leave negative space between elements.
- Poor color balance: Mixing warm and cool tones randomly creates discord. Group similar color temperatures together or use adjustment layers to harmonize.
- Inconsistent frames: Alternating thick and thin borders, or mixing colors randomly, fragments unity. Choose one frame style and apply it throughout.
- Ignoring resolution: Scaling small photos up to fill space results in pixelation and blur. Only use high-resolution source images or accept smaller placements.
- Neglecting composition: Placing all large images on one side creates visual imbalance. Distribute visual weight evenly across your canvas.
Experiment digitally before committing to prints to prevent costly errors and material waste. Create multiple versions, save each as a separate file, and view them at actual size on your screen. Step back physically from your monitor to see how the composition reads from a distance, mimicking how viewers will experience your finished piece.
| Layout Style | Best For | Visual Effect |
|---|---|---|
| Grid | Portfolios, weddings, equal emphasis | Modern, orderly, balanced |
| Organic cluster | Vacations, family events, storytelling | Casual, dynamic, exploratory |
| Scrapbook | Nostalgic themes, mixed media | Decorative, layered, personal |
| Storyboard | Chronological narratives, timelines | Sequential, clear, educational |
Finishing touches and sharing your photo collage
Your collage nears completion, but final review and thoughtful presentation determine whether it becomes a cherished keepsake or a disappointing near-miss. Professional finishing separates competent work from exceptional results that recipients treasure for decades.
Proofread your collage meticulously for alignment issues, color consistency, and spelling if text elements appear. Zoom to 100% and scan every corner for stray pixels, misaligned edges, or color shifts between adjacent photos. If you’ve added captions, dates, or names, triple-check spelling and formatting. A single typo on a wedding gift undermines hours of careful design work.
Choose print materials that match your aesthetic vision and display environment. Canvas prints offer texture and depth, working beautifully for artistic or painterly collages displayed in living rooms or bedrooms. Glossy finishes enhance color saturation and contrast, ideal for vibrant vacation photos or modern designs. Matte prints reduce glare and feel sophisticated, perfect for black and white collages or professional portfolios. Photoshop users can export collages for Instagram, prints, posters, or web sharing with optimal quality by selecting appropriate file formats and resolutions.
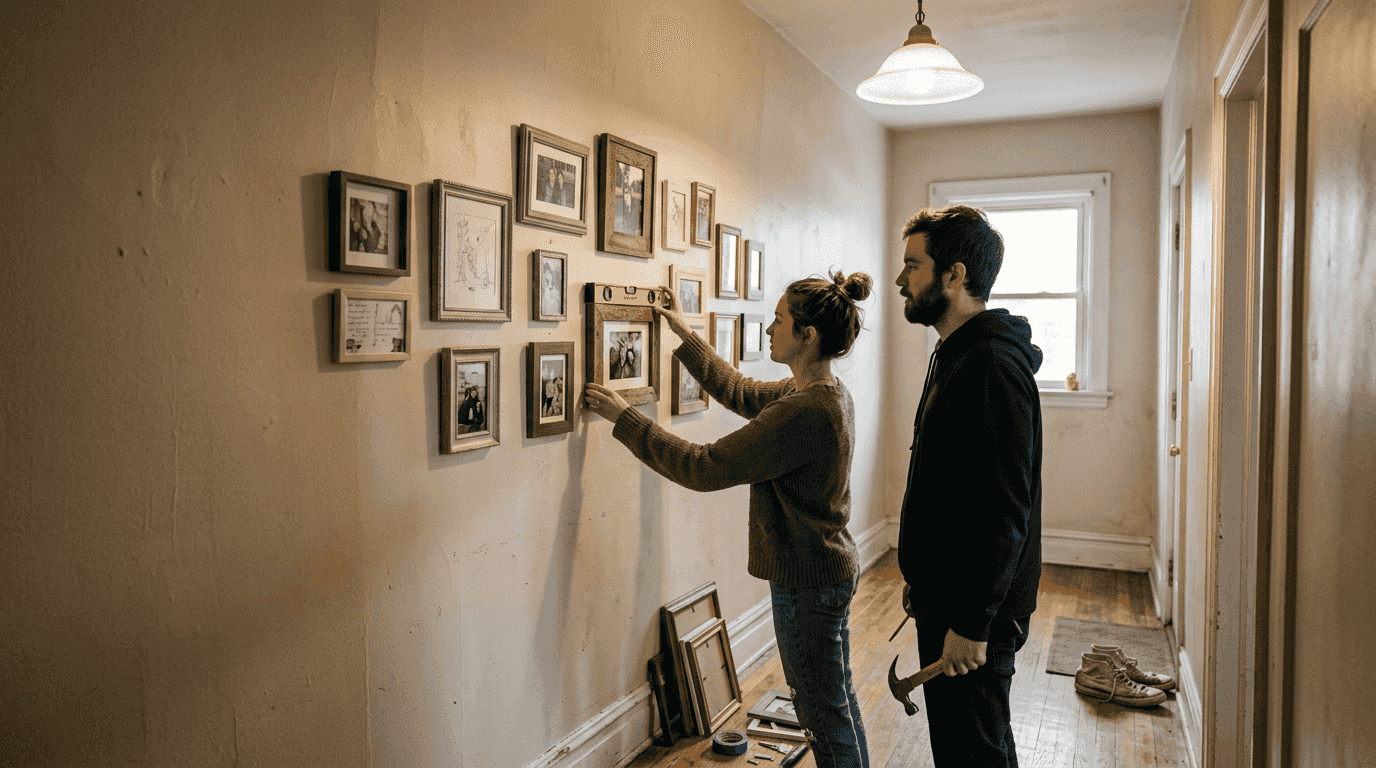
Framing options should complement both your collage and the space where it will hang. Simple black or white frames suit minimalist interiors and keep focus on the photos themselves. Ornate frames add elegance to traditional spaces and formal portraits. Floating frames create depth by suspending the print slightly away from the wall. For photo collage print options that maximize presentation quality, consider professional framing services that use archival materials.
Digital sharing requires format optimization for each platform. Export JPEG files at 1080x1080 pixels for Instagram posts, 1200x628 pixels for Facebook, or 1000x1500 pixels for Pinterest. Use sRGB color space for web display to ensure colors appear consistent across devices. Compress files to under 1MB for faster loading while maintaining visual quality above 80%.
Gift presentation ideas that enhance emotional impact:
- Include a handwritten card explaining the theme and why you chose specific photos
- Use elegant wrapping paper and ribbon that complement your collage’s color scheme
- Create a digital version as a screensaver or slideshow to accompany the physical print
- Pair the collage with a story card describing the memories captured in each photo
- Present it in person if possible to witness the recipient’s genuine reaction
Pro Tip: Order a test print at a smaller size before committing to a large, expensive final version. This reveals color accuracy issues, resolution problems, or design flaws that screens don’t show, letting you make corrections before the final production run.
Create your unique photo collage with Wallfully
You’ve learned the techniques to design stunning photo collages that tell meaningful stories and beautify any space. Now bring those digital creations into the physical world with professional quality that matches your vision. Wallfully specializes in transforming your custom designs into museum-quality prints that become treasured home decor or unforgettable gifts.

Our personalized photo collage prints combine your creative work with premium materials, eco-friendly printing processes, and expert color calibration that ensures your finished piece looks exactly as you intended. Explore our curated collections for inspiration, customize every detail to match your aesthetic, and enjoy free shipping on every order backed by our satisfaction guarantee. Visit Wallfully today to turn your photo collage into a stunning reality that celebrates your most precious memories.
FAQ
What is the best layout style for a photo collage?
Grid layouts offer clean, modern aesthetics perfect for portfolios or events where each photo deserves equal emphasis. Organic clusters feel more casual and dynamic, ideal for storytelling projects like vacations or family gatherings. Your theme and intended display location should guide this choice, with structured grids suiting formal spaces and freestyle arrangements fitting relaxed environments.
Can I create a photo collage without Photoshop?
Absolutely. Physical collages using printed photos, scissors, and adhesive offer tactile satisfaction and work beautifully for scrapbook-style projects. Free digital tools like Canva, GIMP, or Fotor provide templates and basic editing features sufficient for simple collages. The best method depends on your comfort level, budget, and whether you need advanced editing capabilities.
How do I ensure color harmony in my collage?
Stick to a color theme by selecting photos with similar dominant hues, like all warm autumn tones or cool oceanic blues. Use accent colors consistently by repeating a bright element throughout the composition to create visual connections. Converting all photos to monochrome eliminates color conflicts entirely while emphasizing composition and emotional content. Test different approaches digitally before finalizing.
What printing options work best for photo collages?
Canvas prints offer texture and depth ideal for artistic collages, while glossy finishes enhance color vibrancy for modern designs. Matte prints reduce glare and suit sophisticated black and white work or professional presentations. Framing enhances any print by adding protection and visual boundaries that unify diverse elements. For detailed guidance on photo collage print guide options, consider factors like display location, lighting conditions, and your overall aesthetic vision when making material choices.
Recommended
- Photo Collage Art: Creating Personalized Wall Memories
- 6 Best Photo Collage Ideas for Personalized Wall Art
- Expert Guide to Photo Collage Prints for Home Decor
- Photo Collage Wall Art: Transforming Spaces With Memories
- Personalizing Graphic Sweatshirts 2025: Step-by-Step Guide – ChillStitchApparel
- Photo Editing by Cloudfusion